

One of the pet peeves among DIY house painters is seeing blistering paint. This unsightly flaw can ruin interior or exterior house paint. Nothing is as frustrating as finishing painting, only to discover these blisters (or bubbles) on the new paint’s surface.
If you’re in this situation, you may wonder if you did something wrong when applying paint. Or did you forget to prepare the surface (or did it improperly) before painting? Correct surface preparation prevents the finishing paint from blistering or bubbling. But can there be other causes of blistering? And how to remove it? Learn about blistering, its causes, how to prevent it, and how to remove it.
What is blistering?
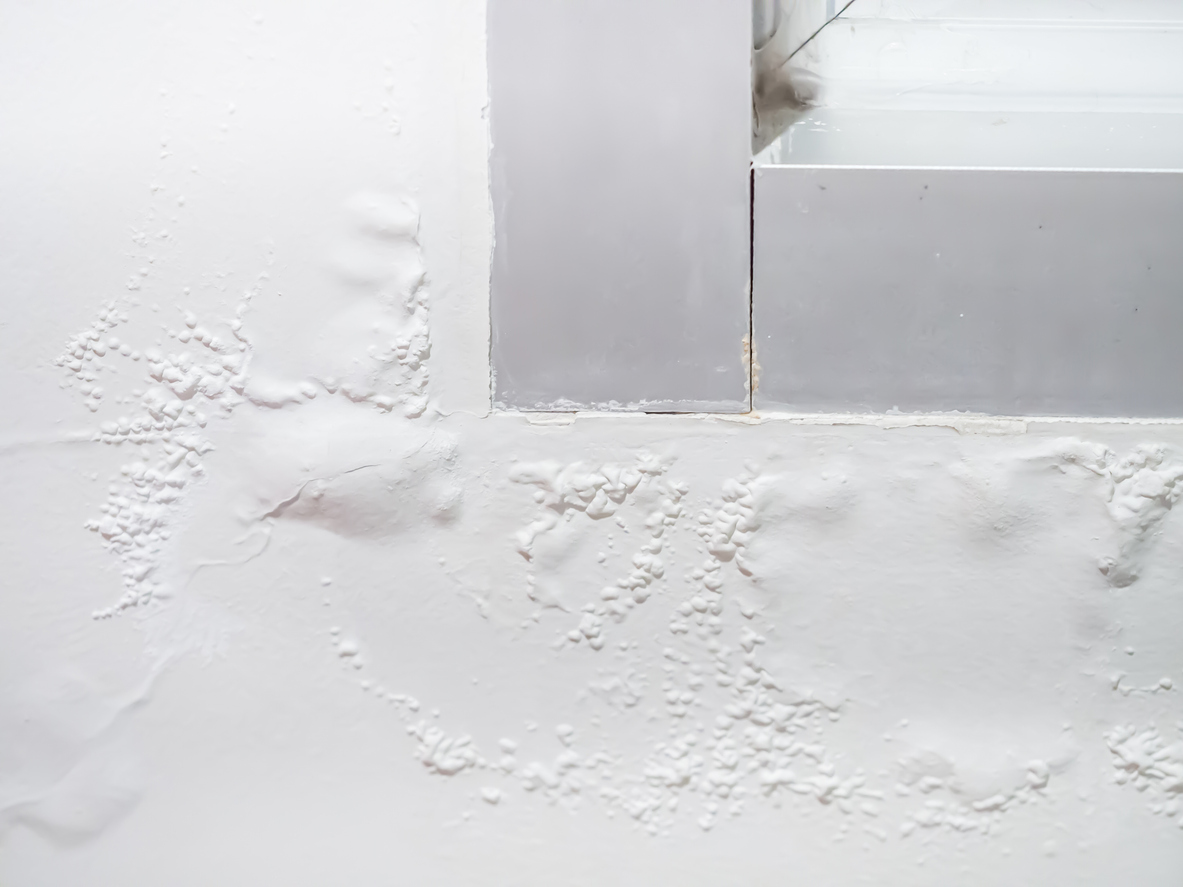
In paint, blistering (or bubbling) is a condition where small to large bubbles or blisters form on the painted surface. These blisters can eventually cause the paint to peel away from the surface, creatingBlistering (or bubbling) is a condition in paint an unsightly appearance and reducing the paint job’s durability.
What are the causes of paint blistering?
-
- Moisture:
- One of the most common causes is moisture, which can get trapped under the paint. This could be caused by painting over a damp surface, painting in humid conditions, or moisture infiltration behind walls or surfaces.
- Heat:
- If paint is applied in direct sunlight or arid conditions, it can dry too quickly. The top layer dries and forms skin before the lower layers dry, trapping air or moisture, leading to blisters.
- Improper surface preparation:
- If dirt, grease, or oils are not properly cleaned from the surface before painting, the paint may not adhere properly, leading to blisters. Similarly, painting over loose or peeling paint can also cause blistering.
- Using incompatible paints:
- Applying oil-based paint over latex paint, or vice versa, can lead to blistering if the paints do not bond well with each other.
- Painting on a hot surface:
- Similar to heat from sunlight, if the surface is hot to the touch, the rapid evaporation of solvents in the paint can cause blistering.
- Trapped air:
- If a thick layer of paint is applied too quickly, it can trap air beneath the surface, which expands as the paint dries, leading to blisters.
- Moisture:
Preventing blistering involves ensuring proper surface preparation, avoiding painting in extreme heat or humidity, and allowing sufficient drying time between coats.

How to prevent blistering?
Consider the detailed tips below to avoid paint blistering during painting projects:
Do a proper surface preparation
-
-
- Clean the surface thoroughly: Dirt, grease, and grime can prevent paint from adhering correctly. Use a degreaser or mild soap solution and scrub the surface to remove contaminants. Rinse with water and allow the surface to dry completely.
- Repair any damage: Fix cracks, holes, and peeling paint. Fill cracks and holes with filler and sand down peeling areas. If old paint is flaking, scrape or sand it until you reach a solid base.
- Sand the surface: For smooth paint adhesion, sand glossy surfaces with fine-grit sandpaper to create a “tooth” that the new paint can grip onto.
- Prime if necessary: If the surface is porous, stained, or previously unpainted (bare wood, metal, or drywall), always use a primer. Priming seals the surface and creates a uniform base, which helps prevent moisture from seeping through and causing blisters.
-
Control moisture
-
-
- Check for moisture problems: Moisture is one of the chief causes of blistering. Inspect the walls or surfaces for water damage, leaks, or high humidity.
- Fix water issues: If there’s a leaky roof, plumbing issue, or moisture infiltration, resolve these problems before painting. Applying paint over a damp surface can trap moisture, leading to blisters.
- Ensure adequate drying time: Whether it’s the primer or the first coat of paint, allow ample drying time between coats. If you apply paint before the underlying coat is fully dry, moisture can get trapped, causing blisters later on.
-
Select the right paint
-
-
- Use quality paints: Higher-quality paints are formulated with better resins and binders, making them less prone to blistering. They also tend to adhere better to surfaces, reducing the chance of blister formation.
- Match the paint to the surface: Different surfaces (wood, metal, drywall, masonry) require specific types of paint. For instance, exterior paint is used for outdoor projects, and specialized metal paints are used for metal surfaces.
- Water-based vs. oil-based: If switching between water-based (latex) and oil-based paints, you must ensure the previous coat is completely dry and compatible with the new coat. Incompatibility can lead to poor adhesion and blistering.
-
Control environmental conditions
-
-
- Paint in the right weather: Ideally, you should paint in mild temperatures (50-85°F or 10-30°C). If it’s too hot, the paint can dry too quickly, trapping moisture underneath. If it’s too cold, the paint may not cure properly, leading to adhesion problems. Avoid painting in direct sunlight or during high humidity, as both can contribute to blistering.
- Avoid painting in humid conditions: High humidity drying and encourages moisture buildup. Use a dehumidifier if you’re painting indoors, and avoid painting outdoors during very humid or rainy conditions.
-
Do proper application techniques
-
-
- Thin, even coats: Applying thick layers of paint can cause the top layer to dry faster than the bottom, trapping moisture underneath and causing blisters. Always apply thin coats and allow each coat to dry completely before adding another.
- Use the right tools: Use brushes and rollers appropriate for the type of paint and surface you’re working on. For example, a roller with too much nap might leave excess paint that could cause bubbles and blisters.
- Don’t overwork the paint: When painting, don’t keep rolling or brushing over areas that have already begun to dry. Overworking the paint can cause bubbles to form in the paint film, which can turn into blisters as the paint dries.
- Avoid over-diluting the paint: Some people water down paint to stretch it, but too much dilution can reduce the paint’s ability to form a strong film, increasing the risk of blistering. Follow the manufacturer’s dilution recommendations.
-
Addressing existing blisters
-
-
- Pop and remove blisters: If blisters appear in existing paint, don’t ignore them. Use a scraper to remove the blistered paint, sand the area smoothly, and assess whether moisture is present.
- Reprime and paint: After removing blisters, clean and dry the surface. Apply a primer to the affected area, and once it’s dry, repaint the surface with thin, even coats.
-
Use additives if needed
-
-
- Flow improvers: If the paint dries too quickly, consider using paint conditioners or flow additives. These products slow down the drying process slightly, allowing for more even coverage and reducing the risk of blistering.
- Anti-bubble products: Some paint manufacturers offer anti-bubble or anti-foaming additives that can help prevent bubbles in the paint, which could turn into blisters.
-
Ensure proper ventilation
-
-
- Promote air circulation: When painting indoors, ensure good air circulation. Open windows and use fans to keep the air moving, but avoid extreme drafts, which can cause uneven drying.
- Use exhaust fans in moist areas: If you’re painting in a bathroom, kitchen, or laundry room, use exhaust fans to keep moisture levels down. Due to high humidity, these areas are particularly prone to blistering.
-
How to remove blistering
To remove paint blisters (or bubbles) once you notice them, follow these steps:
1. Assess the blister
-
-
- Determine the cause of the blistering (which you can see in the previous section). It can result from moisture, painting on a dirty surface, or applying paint in hot or humid conditions. Understanding the cause helps you prevent future blisters.
-
2. Pop the blister
-
-
- Use a sharp utility knife or a small blade to carefully pop the blister without damaging the underlying surface.
-
3. Scrape away loose paint
-
-
- After popping the blister, use a putty knife or paint scraper to remove any loose or peeling paint around the area. Make sure the surface is smooth.
-
4. Sand the area
-
-
- Sand the affected area with fine-grit sandpaper to smooth out any rough edges and ensure the area blends well with the surrounding paint. If necessary, feather the edges to create a seamless transition.
-
5. Clean the surface
-
-
- Clean the sanded area with a damp cloth to remove dust or debris. If the blistering was caused by moisture, ensure the surface is dry before continuing.
-
6. Prime the area
-
-
- Apply a primer to the exposed area, especially if the blistering exposed bare wood, drywall, or any other surface. Priming helps to seal the surface and create a proper base for the paint.
-
7. Repaint
-
-
- Once the primer is dry, repaint the affected area. Blend it into the rest of the wall, using the same paint type and finish that were initially applied.
-
8. Prevent future blistering
-
-
- Address any underlying issues such as moisture problems, applying paint during extreme temperatures, or inadequate surface preparation before painting again. Proper preparation is the key to preventing blisters in the future.
-
Knowing what causes blisters, how to remove them, and how to prevent them from happening ensures a smooth, long-lasting finish on your painted surfaces.
Our team of house painters from Custom Painting, Inc. has the knowledge, skills, materials, track record, and reputation to do your project rights on the first go. Call us at 925-686-0903 or message us here to get a free quote!