
The right wood stain is important for enhancing the natural beauty of wood surfaces and to keep it protected from the elements. Even though wood is a strong material, it is susceptible to damage from moisture, sunlight, and insects. But a proper stain can be a protective shield to ward off rot, decay, and weather-related wear.
We’re here to guide you through the process of choosing the right stain for beauty and protection. This includes information about the different types of stains and the best application methods for durability. Read on to learn more about finding the ideal stain for your wooden surfaces at home.
Understanding Wood Stain
Composition of Wood Stains
Wood stains are used to enhance and protect wood surfaces by penetrating the wood fibers and improving color without covering the natural grain pattern. The composition of wood stains can vary, but most contain the following key ingredients:
- Pigments and Dyes: These provide the color of the stain. Pigments offer opacity and dyes, providing a more translucent finish.
- Binders: Binders help the stain adhere to the wood surface and determine the durability of the finish.
- Carriers: These are the solvents or vehicles that carry the pigments and binders into the wood. Carriers can be water, oil, or alcohol-based, affecting the stain’s drying time and application characteristics.
- Additives: Various additives are included to enhance certain properties such as mildew resistance, ease of application, and the finish’s resistance to fading.
Types of Stains
There are several types of wood stains available, each suited to different projects and preferences:
- Oil-Based Stains: These stains penetrate deeply into the wood, enhancing its durability and water resistance. Oil-based stains are ideal for outdoor furniture, decking, and any wooden surfaces that require robust protection from the elements. They take longer to dry, which allows for a more even application but requires more cleanup effort as they typically need mineral spirits to remove excess.
- Water-Based Stains: Known for their quick drying times and low odor, water-based stains are easier to clean up (requiring only soap and water) and are less toxic than their oil-based counterparts. They are less likely to yellow over time and are a good choice for indoor furniture, trim, and projects where fast completion is desirable.
- Gel Stains: These stains have a thicker consistency, which makes them ideal for use on vertical surfaces or in projects where minimizing dripping and runs is important. Gel stains are excellent for achieving a uniform color on woods that are prone to blotching, such as pine or birch.
- Varnish Stains: Combining the properties of both stain and varnish, these products stain the wood while providing a protective topcoat. This dual function makes varnish stains convenient for projects where time or ease of application is a factor. They are particularly useful for revitalizing old furniture or quick touch-ups.
Each type of stain offers specific advantages and can be chosen based on the needs of the project, desired aesthetics, and the level of protection required. Understanding these options will help you select the perfect stain for your woodworking project.

Factors to Consider When Choosing a Stain
Here are the factors to consider to ensure that the wood not only looks appealing but also receives adequate protection:
Type of Wood
Different types of wood have unique characteristics that affect how they absorb stains and their final appearance. Hardwoods like oak and mahogany, with their dense grain, tend to absorb stain more evenly, allowing for a smoother finish. Softer woods like pine or birch can absorb stains unevenly, often leading to a blotchy appearance unless a pre-stain wood conditioner is used. Additionally, the natural color of the wood can influence the final color of the stain—darker woods might obscure lighter stains. In comparison, lighter woods can be versatile substrates for a wide range of stain colors.
Intended Use of the Wood
The location and function of the stained wood are crucial in choosing the right type of stain. Interior stains are typically formulated with aesthetics and minimal exposure to harsh conditions in mind, focusing on enhancing the wood’s natural beauty. These stains may not have the additives that protect against UV rays or moisture.
Exterior stains, on the other hand, are specifically designed to withstand the elements. They often contain additives that protect against UV damage, moisture, and mildew, making them ideal for decks, siding, and outdoor furniture.
Desired Aesthetics
Stains come in various transparency levels, each impacting the visibility of the wood grain:
- Clear Stains: These are almost transparent, providing a natural look while still offering protection. They are ideal for showcasing premium wood grains.
- Semi-Transparent Stains: These allow for the wood’s natural grain to show through while adding a hint of color. They are suitable for those who wish to enhance the natural appearance of their wood while adding character through color.
- Semi-Solid Stains: With more opacity, these stains provide more pronounced coloration while still allowing some of the wood’s natural patterns to be seen. They strike a balance between color and texture visibility.
- Solid Stains: These are nearly opaque, similar to paint, and are best for hiding imperfections or mismatched colors in the wood. Because of their pigmentation, solid stains provide the most protection from UV rays but cover most of the grain and natural character of the wood.
Environmental Conditions
The stain selected must be capable of standing up to the local environmental conditions:
- UV Exposure: Constant exposure to sunlight can degrade the wood and fade the stain. Products specifically designed to resist UV rays are crucial in sunny climates.
- Moisture: In damp or rainy climates, a stain with excellent water-resistant properties is necessary to prevent wood rot and mold growth.
- Temperature Fluctuations: Extreme temperatures can cause wood to expand and contract, leading to cracks in the finish. Stains that are flexible and can move with the wood are ideal in these conditions.
Considering these factors will help you choose a stain that not only looks good but also extends the life of your wood projects by providing appropriate protection against environmental challenges and wear.
Application Techniques for Optimal Results
Achieving a professional-quality finish when staining wood involves meticulous preparation, careful application, and patience during the drying and curing process. Here’s how to handle each stage correctly to achieve optimal results.
Surface Preparation
The key to a successful stain application begins with proper surface preparation, ensuring the stain adheres evenly and penetrates deeply.
- Cleaning: Start by thoroughly cleaning the wood to remove any dust, dirt, grease, or old finishes. A clean surface allows the stain to penetrate uniformly.
- Sanding: Sand the wood along the grain using progressively finer grits of sandpaper. Begin with a coarse grit to remove imperfections and old finish, and finish with a fine grit to smooth the surface. Sanding not only smooths the wood but also opens up the pores, enhancing stain absorption.
- Priming: While not always necessary, a pre-stain wood conditioner is recommended for soft or porous wood like pine or fir. This step helps prevent blotchy or uneven color absorption.
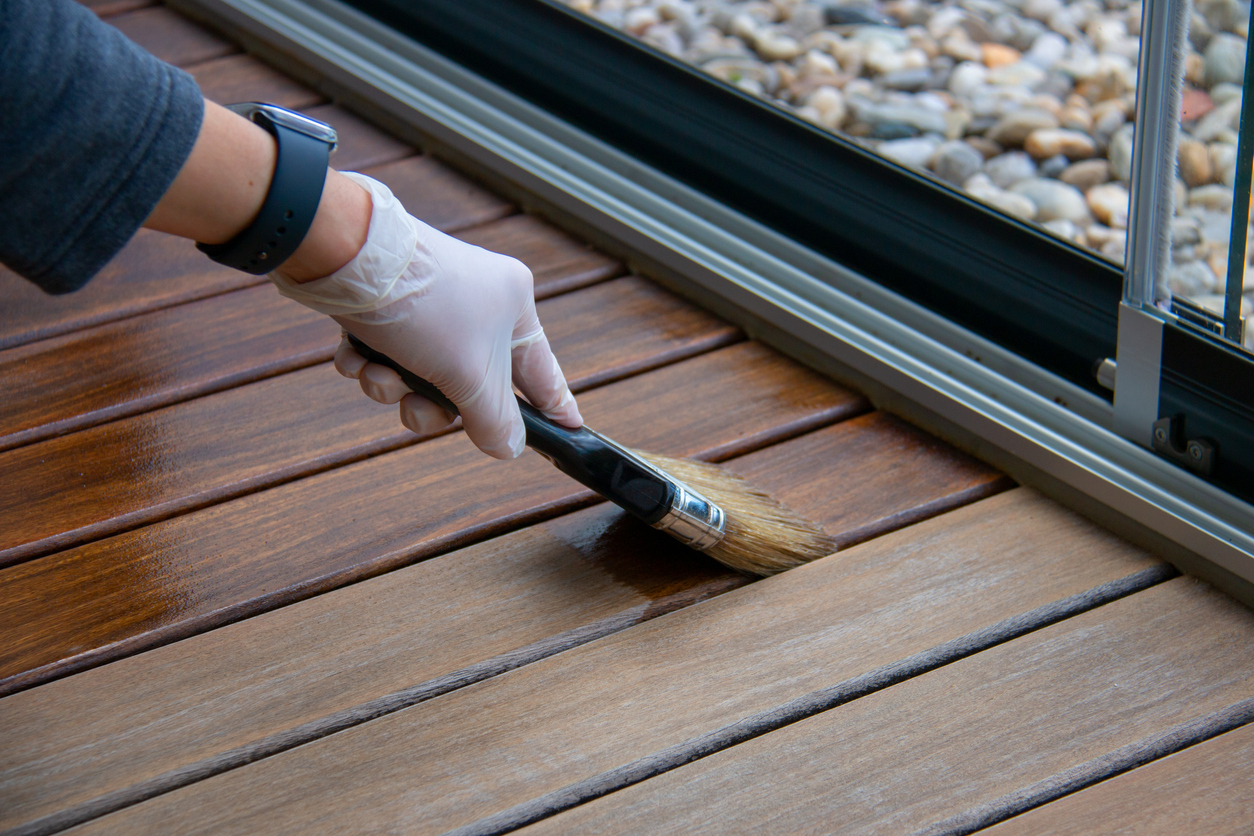
Applying the Stain
The application method can vary based on the type of stain and the size of the project. Common tools include brushes, rollers, and sprayers.
- Brush: A natural bristle brush is ideal for oil-based stains, while synthetic brushes are better for water-based stains. Apply with the grain of the wood, ensuring that the stain is absorbed evenly. Brushes are perfect for detailed work and smaller areas.
- Roller: Rollers can cover large, flat surfaces quickly. Use a medium nap roller to achieve an even layer of stain. It’s often helpful to back-brush the rolled stain to ensure even penetration and to work the stain into the wood grain.
- Sprayer: A sprayer is efficient for large or intricate projects. It provides a fast, even coat but requires skill to manage overspray and to achieve uniform coverage. Always follow up with a brush to even out drips or heavy spots.
Tips for Even Coverage:
- Maintain a wet edge by working in sections. This technique avoids overlap marks.
- Wipe off excess stain with a clean cloth following the grain to achieve a uniform depth of color and to prevent stickiness or uneven drying.
Drying and Curing Time
- Drying Time: Each stain type and brand will have specific instructions regarding drying times, which must be followed precisely. Drying time can be influenced by humidity, temperature, and airflow. Typically, stains should be touch-dry within a few hours, but this can vary.
- Curing Time: The full curing time for a stain is longer than the drying time and can range from a few days to a week. During this period, the stain achieves its final hardness and durability. To avoid damage or imperfections, avoid using or placing anything on the stained surface until fully cured.
Respecting the drying and curing times recommended by the stain manufacturer is critical for achieving a durable and attractive finish. Rushing these stages can result in a tacky finish, poor adhesion, or a lack of protection, undermining all the effort put into the preparation and application stages.
Solving Common Staining Challenges
Even with careful preparation and application, staining wood can sometimes result in issues that affect the appearance and longevity of the finish. Understanding how to solve common challenges can help ensure a smooth and successful staining project.
Stain Fails to Adhere or Absorb
Possible Causes:
- Surface Contamination: Residues of oil, wax, or previous finishes can prevent stains from penetrating the wood.
- Over-sanding: If the wood is sanded too finely, it can close the pores, hindering stain absorption.
- Inadequate Preparation: Incomplete removal of old finishes or inadequate cleaning can lead to poor stain adherence.
Solutions:
- Thorough Cleaning: Make sure the wood is free of any contaminants by cleaning it with a suitable wood cleaner or mineral spirits. After cleaning, allow the wood to dry completely before applying the stain.
- Correct Sanding: Avoid using very fine sandpaper for the final sanding before staining. Typically, finishing the sanding process with 120-150 grit sandpaper is suitable for most staining projects.
- Remove Old Finish Completely: If previous finish remnants are causing the issue, strip the wood back to bare using a chemical stripper or sanding, then clean thoroughly before reapplying the stain.
Uneven Color and Patchiness
Possible Causes:
- Uneven Application: Applying stain unevenly can lead to splotches and dark patches.
- Variations in Wood Density: Different parts of the wood may absorb stains at different rates, particularly in woods like pine or birch.
- Insufficient Stirring: Stain components can settle in the container, leading to color inconsistencies if not properly mixed.
Solutions:
- Consistent Application: When applying stain, use uniform strokes and maintain a wet edge. This technique helps prevent overlapping marks and promotes even color.
- Use of Pre-Stain Conditioner: Particularly with soft or porous woods, applying a pre-stain conditioner can help normalize the absorption rate across the surface, reducing blotchiness.
- Thorough Mixing: Always stir the stain thoroughly before and occasionally during use to ensure the pigments and solvents are well mixed.
Fixing Issues
- Sanding and Reapplication: For areas that are too dark or uneven, lightly sand the surface to remove some of the stain and reapply it more evenly. Be careful not to remove too much of the base material.
- Adding a Second Coat: If the color is uneven but not too dark, applying a second, lighter coat can help even out the appearance. This should be done carefully to avoid making the color too dark.
- Blend with a Cloth: Sometimes, lightly dabbing the stained area with a cloth moistened with stain can help blend away the edges of patchy spots, smoothing out the transition.
Addressing these common staining challenges effectively can help achieve a more professional finish, enhancing your wood projects’ beauty and durability.
Conclusion
Choosing the right stain is indeed important in order to achieve a beautiful and long-lasting finish for wooden surfaces. By understanding the factors that influence stain behavior and learning how to address common challenges, you can ensure that your wood staining projects enhance the wood’s beauty and durability. If you need professional assistance when it comes to wood staining, don’t hesitate to contact Custom Painting, Inc. You can contact us at 925-686-0903 or fill out our contact form. We are here to provide you with expert advice and services.