
Adding and painting interior barn doors is a fantastic way to enhance the style and functionality of your home in Pleasant Hill. Whether you’re looking to create a rustic charm or add a modern touch, barn doors can fit a variety of decor styles. Let us learn more about the process of selecting, installing, and painting interior barn doors. Your living space will be transformed with this versatile and trendy feature. From choosing the right door to achieving a flawless paint finish, we’ve got you covered with easy-to-follow steps and helpful tips. In some cases light carpentry skills might be neede
Choosing the Right Barn Door
Selecting the perfect barn door for your Lafayette, CA home involves considering various styles, materials, and the specific needs of your space. The right barn door not only enhances your interior design but also provides practical benefits like saving space and adding a unique focal point. Here’s a guide to help you make the best choice.
Different Styles of Barn Doors
Barn doors come in a variety of styles, each offering a distinct look and feel:
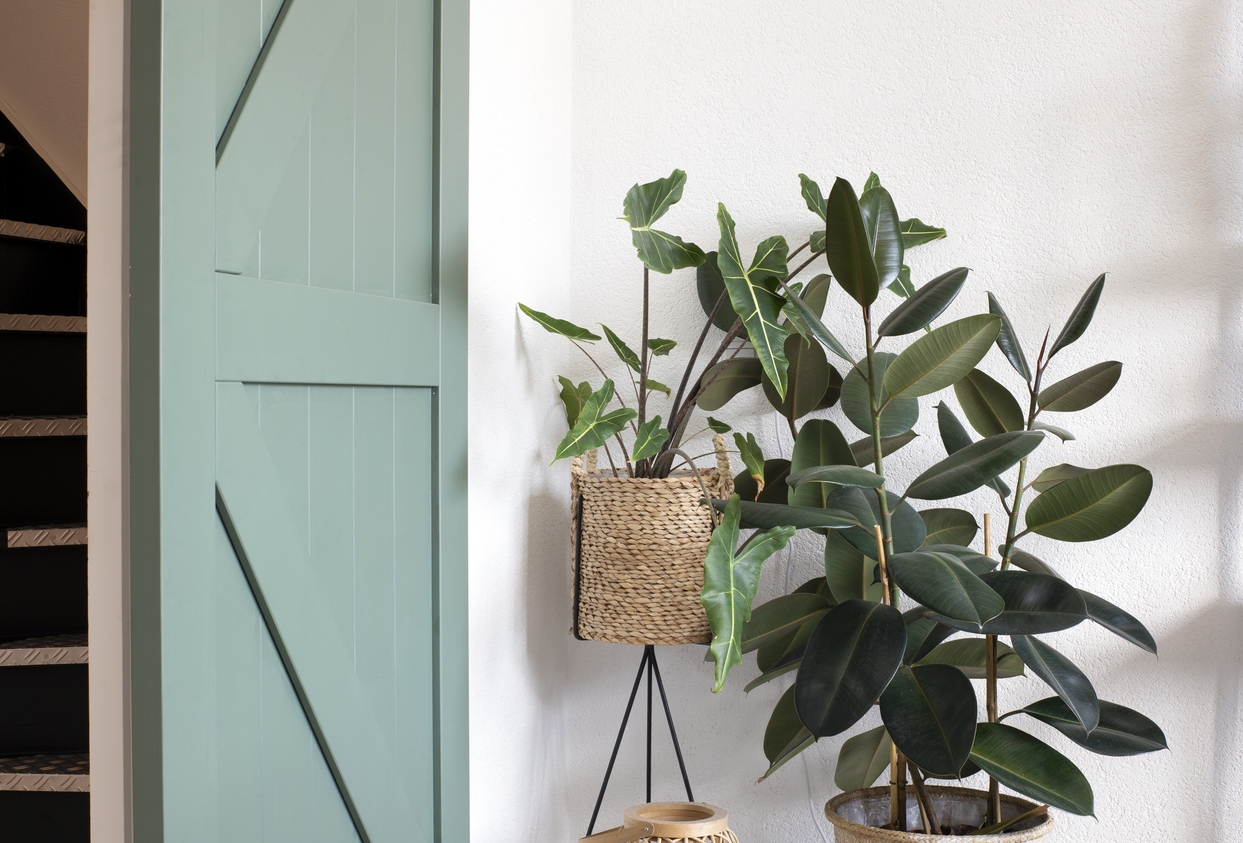
- Rustic: These doors often feature natural wood finishes, distressed paint, and hardware that gives a rugged countryside charm. They are perfect for creating a cozy, farmhouse vibe.
- Modern: Sleek lines, smooth finishes, and minimalistic hardware define modern barn doors. They are ideal for contemporary homes, adding a touch of elegance and simplicity.
- Vintage: Vintage barn doors often have intricate designs, antique hardware, and a weathered look. They bring a sense of history and character to any room and are perfect for eclectic or traditional interiors.
Materials to Consider
The material of your barn door plays a crucial role in its appearance, durability, and maintenance:
- Wood: A popular choice for its natural beauty and versatility. Wood can be stained or painted to match your decor and is available in various types, like oak, pine, and cedar.
- Metal: This type of door offers a sleek and industrial look. Metal doors are durable and can be used in both modern and rustic settings. They require less maintenance than wood.
- Composite: Made from engineered wood or other synthetic materials, composite doors are often more affordable and resistant to warping and moisture. They can mimic the look of natural wood or have unique finishes.
Tips for Selecting the Right Size and Design
Choosing the right size and design ensures your barn door functions well and complements your space:
- Measure Carefully: Ensure you measure the doorway accurately, including the height, width, and any surrounding wall space needed for the door to slide open.
- Consider the Room: Think about the room’s decor and purpose. For instance, a rustic door may suit a cozy bedroom, while a modern door might be better for a sleek living room or office.
- Hardware and Accessories: The hardware, such as the track and handles, should match the style of the door. Rustic doors might have wrought iron handles, while modern doors could feature stainless steel hardware.
- Functionality: Consider if the door will be used frequently or if it’s more of a decorative element. Heavier, solid wood doors may be more durable for high-traffic areas, while lighter composite doors can work well for less-used spaces.
By carefully considering the style, material, and size of your barn door, you can ensure it not only enhances your home’s aesthetics but also meets your practical needs.
Installing the Barn Door
Proper installation of a barn door is essential to ensure it functions well and adds the desired aesthetic to your space. Here’s a comprehensive guide to help you with the process, from gathering the necessary tools to making sure your door operates smoothly and safely.
Tools and Materials Needed for Installation
Before you begin, make sure you have the following tools and materials:
- Barn door kit (including the door, track, rollers, and hardware)
- Measuring tape
- Level
- Drill and drill bits
- Screwdriver
- Stud finder
- Wrench
- Pencil
- Safety glasses
- Ladder or step stool
Step-by-Step Guide to Installing the Door Track and Hardware
1. Measure and Mark
- Measure the width and height of your door opening.
- Mark the position of the track above the doorway, ensuring there is enough space for the door to clear the floor and ceiling.
2. Locate the Studs
- Use a stud finder to locate the studs in the wall above the doorway.
- Mark the studs where you will attach the track for secure mounting.
3. Install the Track
- Hold the track against the wall, aligned with your marks.
- Drill pilot holes into the studs.
- Secure the track to the wall using the provided screws and a wrench, ensuring it is level.
4. Attach the Rollers to the Door
- Lay the door flat on a padded surface.
- Attach the rollers to the top of the door using the screws and hardware included in your kit.
- Ensure the rollers are evenly spaced and securely fastened.
5. Hang the Door
- Lift the door and position the rollers onto the track.
- Carefully slide the door along the track to ensure it moves smoothly.
Tips for Ensuring the Door is Level and Operates Smoothly
- Check Alignment: Use a level to ensure the track is perfectly horizontal before securing it to the wall. An uneven track will cause the door to slide improperly.
- Adjust Rollers: If the door doesn’t slide smoothly, check the roller alignment and adjust if necessary.
- Secure Stops: Install the door stops at each end of the track to prevent the door from sliding off.
- Test Operation: Slide the door back and forth a few times to ensure it moves smoothly and quietly.
Safety Precautions to Keep in Mind During Installation
- Use Proper Tools: Ensure you have the right tools for the job to avoid injuries or damage to the materials.
- Wear Safety Gear: Always wear safety glasses to protect your eyes from debris.
- Secure the Area: Keep the installation area clear of obstructions and make sure ladders or step stools are stable.
- Have Assistance: Barn doors can be heavy and awkward to handle. Having an extra pair of hands can prevent accidents and make the installation process easier.
By following these steps and tips, you can successfully install a barn door that enhances your home’s functionality and style. Remember to take your time and prioritize safety throughout the installation process.
Preparing the Barn Door for Painting

Painting your barn door is a crucial step in ensuring it not only looks great but also has a durable finish. Proper preparation is key to achieving a professional and long-lasting result. Here’s how to get your barn door ready for painting.
Cleaning and Sanding the Door
- Clean the Surface: Start by removing any dust and debris from the door using a soft cloth or vacuum with a brush attachment. Wipe down the door with a mixture of mild soap and water to remove any grease or grime. Rinse with clean water and allow the door to dry completely.
- Sand the Door: Use medium-grit sandpaper (120-150 grit) to sand the entire surface of the door. This helps to smooth out any rough areas and remove the existing finish, if any. Pay extra attention to edges and corners to ensure they are smooth and free of splinters. Finish with fine-grit sandpaper (220 grit) for a smooth surface ready for priming. Wipe away any sanding dust with a damp cloth or tack cloth.
Applying Primer
- Choose the Right Primer: Use a high-quality wood primer to ensure good adhesion and a smooth finish. For metal barn doors, select a primer specifically designed for metal surfaces to prevent rust and ensure durability.
- Apply the Primer: Apply the primer in even, thin coats using a brush or roller. Start with the edges and corners, then move to the larger flat surfaces. Allow the primer to dry according to the manufacturer’s instructions. This usually takes a few hours, but it’s best to let it dry overnight for optimal results. Lightly sand the primed surface with fine-grit sandpaper (220 grit) to smooth out any imperfections. Wipe away the dust before painting.
Choosing the Paint
Choose a high-quality interior paint that matches the desired finish—whether it’s matte, satin, or glossy. For areas with high traffic, consider using a durable, washable paint to keep the door looking fresh over time. Pick a color that complements your room’s decor. Neutral colors like white, gray, or black are popular choices, but don’t be afraid to use bold colors for a statement piece.
Painting the Barn Door
Painting your barn door is a creative and rewarding process that can completely transform its appearance. By following the right steps and using quality materials, you can achieve a stunning, durable finish. Here’s a detailed guide on how to paint your barn door effectively.
Setting Up Your Workspace
Create a comfortable and safe workspace for painting:
- Ventilation: Ensure the area is well-ventilated to avoid inhaling fumes. Open windows or use fans if indoors.
- Protection: Lay down drop cloths or plastic sheeting to protect the floor from paint spills and drips.
- Lighting: Make sure the space is well-lit so you can see the coverage and finish clearly.
Applying the Paint
- Stir the Paint: Use a stir stick to mix the paint thoroughly, ensuring an even color and consistency.
- Paint the Edges and Details: Start with the edges and any detailed areas using a paintbrush. Apply the paint in smooth, even strokes, following the grain of the wood if applicable.
- Paint the Larger Surfaces: For larger, flat surfaces, use a paint roller. Roll the paint in even, overlapping strokes to avoid streaks and ensure uniform coverage. Apply thin coats of paint to prevent drips and achieve a smooth finish. It’s better to apply multiple thin coats rather than one thick coat.
- Let the First Coat Dry: Allow the first coat of paint to dry completely according to the manufacturer’s instructions. This usually takes a few hours.
Applying Additional Coats
- Lightly Sand Between Coats: After the first coat is dry, lightly sand the surface with fine-grit sandpaper (220 grit) to remove any imperfections and ensure a smooth base for the next coat. Wipe away the dust with a clean cloth or tack cloth.
- Apply Subsequent Coats: Apply a second coat of paint in the same manner as the first. Thin, even coats will produce the best results. Allow each coat to dry completely before adding the next. Depending on the paint color and desired finish, you may need to apply additional coats. Darker colors or bold shades might require more coats for full coverage.
Finishing Touches
- Remove Painter’s Tape: Once the final coat is still slightly tacky but mostly dry, carefully remove the painter’s tape to prevent the paint from peeling.
- Inspect and Touch Up: Inspect the door for any missed spots, drips, or uneven areas. Touch up these spots with a brush for a flawless finish.
Curing Time
After the final coat is applied, allow the paint to cure fully. Depending on the paint type and environmental conditions, this can take several days to a week. To ensure a durable finish, avoid heavy use or contact during this time.
Safety Precautions
- Proper Ventilation: Always work in a well-ventilated area to avoid inhaling paint fumes.
- Protective Gear: Wear gloves, safety glasses, and a mask if necessary to protect your skin and lungs from paint and dust.
- Clean Up: Clean brushes, rollers, and other tools immediately after use to keep them in good condition and prevent the buildup of dried paint.
By following these steps, you can paint your barn door with confidence, achieving a beautiful, long-lasting finish that enhances your space. Taking the time to prepare properly and apply the paint with care will ensure professional results that you can enjoy for years to come.
Conclusion
Painting your barn door can transform the look of your space, adding a touch of style and personality. By following the steps outlined, you can achieve a professional and durable finish. If you need assistance or want expert results, contact Custom Painting, Inc. at 925-686-0903 or fill out our contact form for a consultation. Let us help you bring your vision to life!