
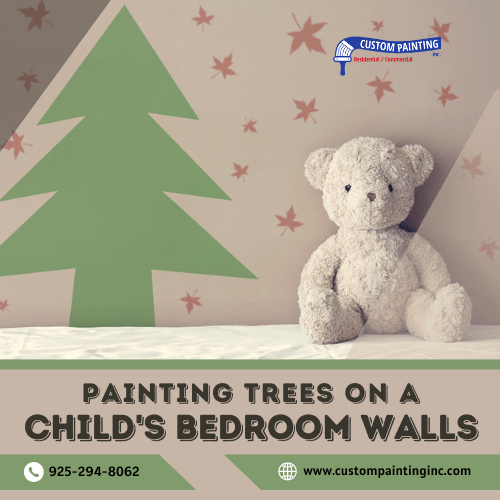
Decorating a child’s bedroom is a special opportunity to create a space that’s both imaginative and comforting. Painting trees on the walls can bring a touch of nature indoors, sparking creativity and providing a calming atmosphere. In this guide, we’ll help you create a beautiful and personalized space that your child will love.
Planning Your Design
Creating a beautiful and cohesive mural of trees on a child’s bedroom wall begins with careful planning. Thoughtful consideration of the design elements will help you achieve a look that is both visually appealing and perfectly suited to the room’s overall atmosphere. Below are key aspects to consider as you plan your design.
Deciding on the Type of Trees: Realistic, Whimsical, or Fantasy
The first decision to make is the style of trees you want to paint. Each style brings a different feel to the room:
- Realistic Trees: These are detailed and lifelike, bringing a sense of the natural world into space. Realistic trees can create a calm and serene environment, perfect for a nature-inspired theme.
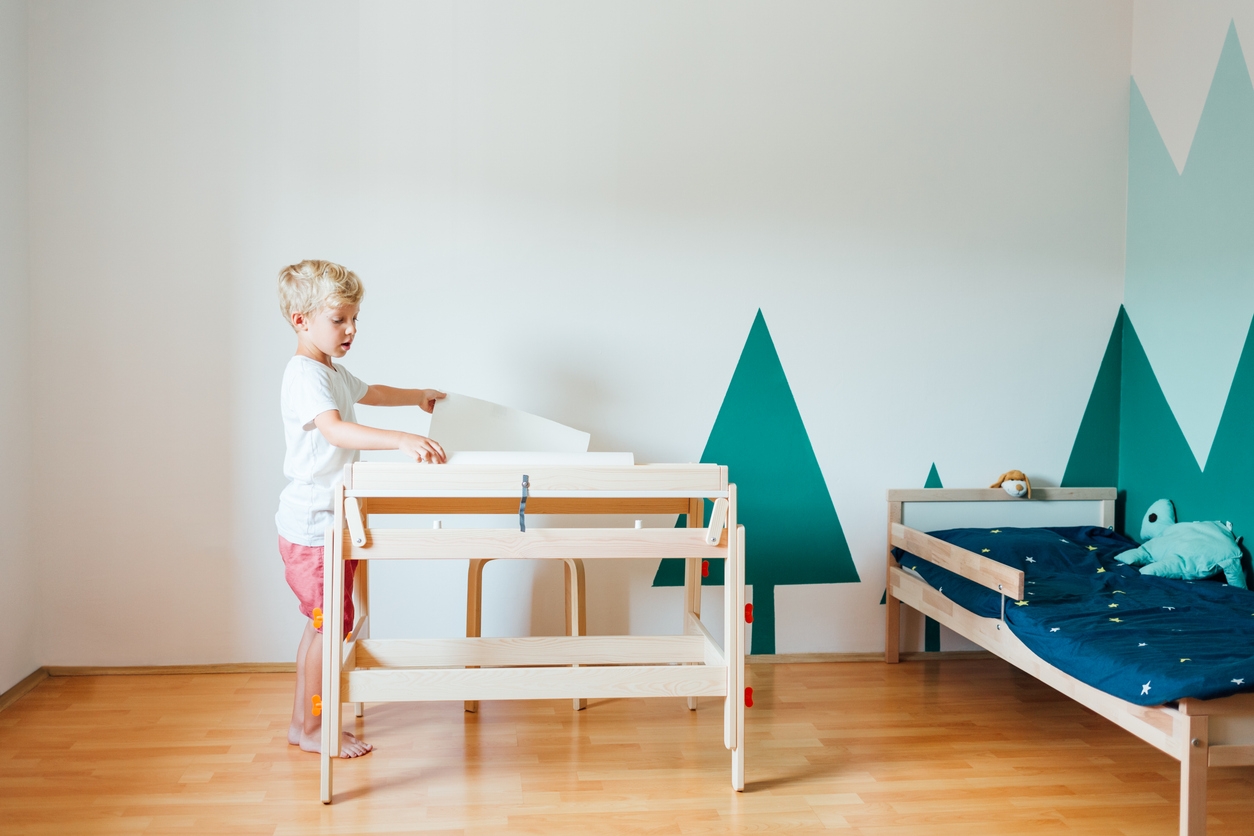
- Whimsical Trees: With playful shapes and exaggerated features, whimsical trees add a fun and imaginative touch to the room. They are great for creating a lighthearted, joyful atmosphere.
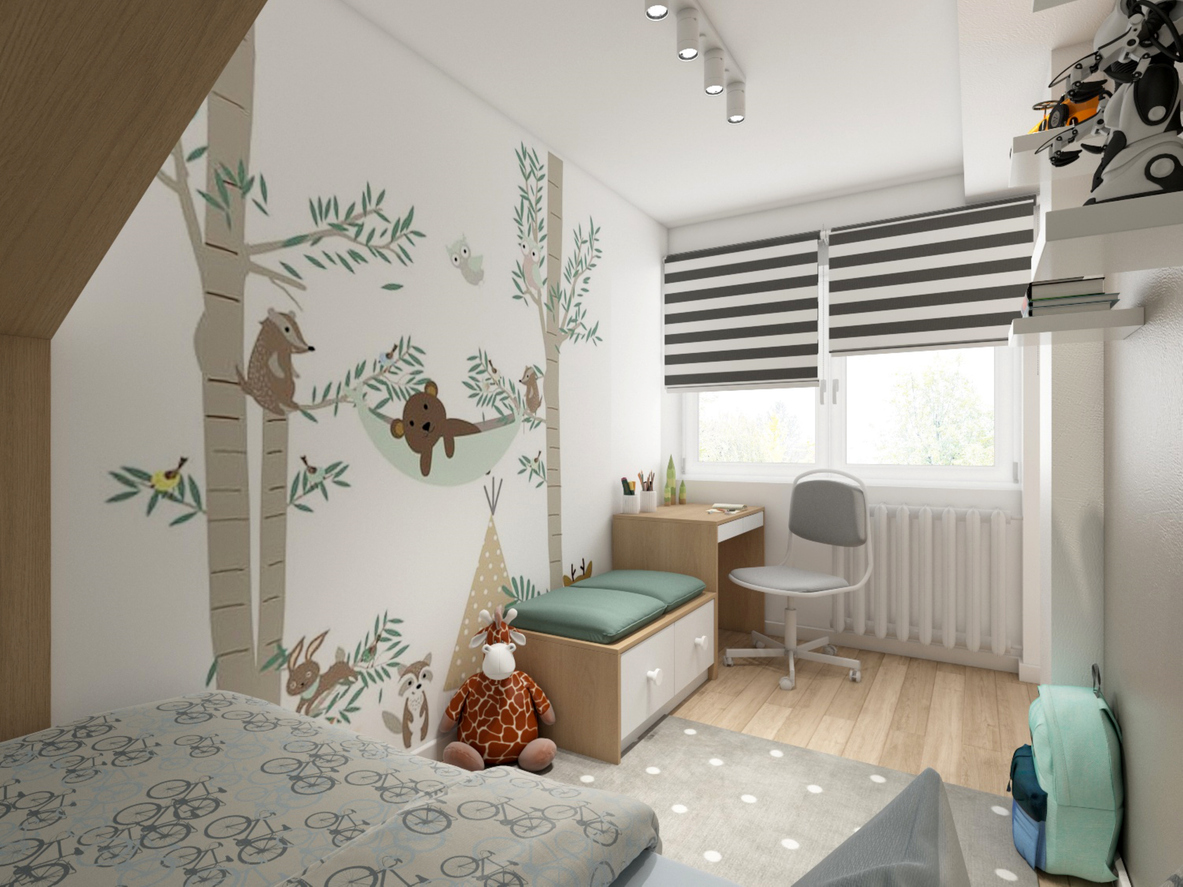
- Fantasy Trees: These are the most creative and imaginative, often featuring unusual colors, magical elements, or fantastical shapes. Fantasy trees can transport a child to an enchanted forest or a fairy tale world, making the room feel like a magical retreat.
Considering the Overall Theme and Color Scheme of the Room
Once you’ve decided on the style of trees, consider how they will fit into the room’s overall theme and color scheme. The trees should enhance the existing decor and create a harmonious look:
- Theme: Whether the room is themed around a woodland adventure, a fairy tale castle, or a jungle safari, the trees should complement and enhance this theme. Choose tree types and details that align with the story or mood you’re trying to create.
- Color Scheme: The colors of the trees should blend well with the room’s palette. For example, soft, muted greens and browns work well in a neutral, calming room, while bright, bold colors might be perfect for a more vibrant and energetic space. Consider how the tree colors will interact with other elements, such as bedding, curtains, and furniture.
Sketching the Design Layout and Placement on the Walls
Before you start painting, it’s essential to sketch out your design to plan the placement of the trees on the walls. This step helps ensure that your mural will be well-balanced and suited to the room’s layout:
- Design Layout: Decide how many trees you want to include and where they will be placed. Consider the size of the room and the amount of wall space available. Large trees might serve as focal points, while smaller ones can be used to fill in gaps or frame key areas like windows or doorways.
- Placement: Think about how the trees will interact with the furniture and other room features. For instance, placing a large tree near the bed can create a cozy reading nook, while trees placed around a window might frame a beautiful outdoor view. Sketching the design beforehand allows you to visualize the final result and make any adjustments before you start painting.
By carefully planning your design, you can create a mural of trees that not only looks beautiful but also enhances the overall feel of the room, making it a special space for your child.
Choosing the Right Materials
Selecting the appropriate materials is crucial when painting a child’s bedroom, ensuring the space is not only beautiful but also safe and long-lasting. From picking the right paint to gathering the necessary tools, here’s what you need to consider.
Selecting Safe, Non-Toxic Paints Suitable for Children’s Rooms
When painting a child’s room, safety is the top priority. It’s essential to choose paints that are specifically labeled as safe and non-toxic. Look for paints that are low in volatile organic compounds (VOCs), as these emit fewer harmful fumes, making them a healthier option for indoor use. Many brands offer paints designed for children’s spaces that are free from harsh chemicals and safe for use in nurseries and bedrooms. Additionally, consider paints that are durable and washable, as this will make it easier to clean any scuffs or marks over time without damaging the finish.
Gathering Necessary Tools: Brushes, Rollers, Painter’s Tape, and Stencils
To achieve a professional-looking mural, you’ll need the right tools. Here’s a list of essential items to gather:
- Brushes and Rollers: Choose a variety of brush sizes for different levels of detail. Small brushes are perfect for intricate work, while larger brushes or rollers can cover broad areas quickly. Foam rollers are especially useful for achieving a smooth finish on large sections.
- Painter’s Tape: This is crucial for creating clean, sharp edges and protecting areas of the wall you don’t want to paint. Use it to outline tree trunks, branches, or other design elements before you begin painting.
- Stencils: If you’re not confident in freehand painting or want to ensure uniformity, stencils can be a great help. They allow you to replicate patterns or shapes consistently and can be especially useful for adding leaves, flowers, or other decorative details.
Preparing the Wall Surface: Cleaning, Priming, and Ensuring a Smooth Base
Before you start painting, proper wall preparation is essential for achieving the best results:
- Cleaning: Begin by thoroughly cleaning the walls to remove any dust, dirt, or grease. A clean surface ensures that the paint adheres properly and results in a smooth, even finish. Use a mild detergent and a damp cloth to wipe down the walls, and allow them to dry completely before proceeding.
- Priming: Applying a primer is a crucial step, especially if the wall is new, has never been painted, or if you are covering a darker color with a lighter one. Primer helps create a uniform base and enhances the paint’s adhesion and durability. Choose a primer that is suitable for the type of paint you’ve selected.
- Ensuring a Smooth Base: Inspect the wall for any imperfections such as cracks, holes, or uneven areas. Fill any gaps with a suitable filler, then sand the area smooth once it’s dry. This will help prevent any bumps or rough patches from showing through the paint.
By carefully selecting safe materials, gathering the right tools, and preparing the wall surface, you can ensure that your mural will be both beautiful and long-lasting, creating a delightful and safe environment for your child.
Painting Techniques
Creating a mural of trees on a child’s bedroom walls can be both a fun and rewarding project. Using the right painting techniques will help you achieve a professional and polished look. Here’s a step-by-step guide to help you bring your design to life.
A Step-by-Step Guide to Creating Tree Trunks and Branches
- Start with the Trunks: Begin by outlining the tree trunks. Use a pencil to lightly sketch the trunks directly onto the wall, ensuring they are in proportion with the room and other elements in your design. If you’re going for a more natural look, vary the thickness and shape of each trunk to mimic the irregularity found in real trees.
- Base Coat: Apply a base coat of paint to the tree trunks using a medium-sized brush or roller. Choose a color that suits your design—brown for a realistic look, or any other color for a whimsical or fantasy effect. Allow the base coat to dry completely.
- Add Texture: To give the trunks more dimension, use a smaller brush to add texture. Lightly brush on a slightly darker or lighter shade of your base color to create the appearance of bark. Use vertical strokes for a rough texture or horizontal dabs for a smoother look.
- Painting Branches: Once the trunks are complete, move on to the branches. Using a smaller brush, paint the branches extending from the trunks. Start with the thicker branches at the base and gradually taper them as they extend outward. For a more natural appearance, vary the angles and curves of the branches. Let them intersect or overlap slightly to create depth.
Techniques for Adding Leaves, Flowers, and Other Details
- Painting Leaves: There are several ways to add leaves, depending on the style you’re aiming for. For a simple approach, use a round brush to paint individual leaves in clusters, varying their size and direction. For a fuller, more detailed look, use a sponge or crumpled paper to dab on leaves, creating a more textured and layered effect.
- Adding Flowers: Flowers can be a beautiful addition to your tree mural. Use small brushes to paint the petals and center of each flower. For a more uniform look, you might want to use stencils or stamps (more on this below). Vary the colors and sizes of the flowers to add interest and realism.
- Other Details: Depending on your design, you may want to add other elements, such as birds, butterflies, or small woodland creatures. These can be painted freehand or added using stencils. For fine details, use the smallest brushes you have and work slowly to ensure precision.
Tips for Using Stencils and Stamps for Consistency and Ease
- Stencils: Stencils are an excellent tool for ensuring consistency, especially when repeating shapes like leaves, flowers, or even entire trees. To use stencils effectively, tape them securely to the wall to prevent shifting. Apply the paint using a stencil brush or sponge, lightly dabbing the paint to avoid bleeding under the stencil. For a more subtle look, use less paint and build up layers gradually.
- Stamps: Stamps can make quick work of repetitive details like leaves or flowers. Dip the stamp lightly into the paint, ensuring it’s evenly coated, and press it firmly against the wall. Rotate the stamp slightly each time you use it to avoid a too-uniform appearance. Stamps are particularly useful for adding texture and pattern without the need for precise brushwork.
- Layering and Blending: For a more dynamic and realistic effect, consider layering different shades of paint when using stencils or stamps. Start with a lighter base color, then add a darker shade on top to create depth. Blending can be done with a dry brush technique, where you lightly blend the edges of the shapes to soften the transition between colors.
By following these techniques, you can create a stunning mural of trees, complete with detailed trunks, branches, and foliage, that will transform your child’s bedroom into a whimsical and inviting space.
Involving Your Child
One of the most rewarding aspects of decorating a child’s bedroom is the opportunity to involve your child in the process. By encouraging their input and creativity, you can make the experience both fun and meaningful, creating a space they’ll feel truly connected to.
Encouraging Your Child’s Input and Creativity in the Design Process
Involving your child in the design process is a great way to make them feel ownership over their room. Start by discussing ideas together—ask them what kinds of trees they like, whether they prefer a realistic or fantasy style, and what colors they would love to see on their walls. Encourage them to share their thoughts and ideas, no matter how imaginative they may be. This not only makes the room more personal but also helps foster their creativity and decision-making skills.
You can also let them draw their own version of the mural on paper. Even if you don’t follow their drawing exactly, this step can give you insights into their preferences and ideas. Plus, it’s a fun way to get them excited about the project!
Simple Tasks Your Child Can Help With
Even if they’re too young to handle a paintbrush for the detailed work, there are plenty of ways your child can contribute to the painting process:
- Choosing Colors: Let your child help pick out the colors for the trees, leaves, and any additional details. Take them to the store to look at paint swatches, or narrow down a few options at home and let them make the final choice. This is a simple yet significant way they can have a say in how their room looks.
- Adding Handprints: A wonderful and personal touch is to incorporate your child’s handprints into the mural. They can create the leaves of the tree by pressing their painted hands onto the wall or add their handprints at the base of the tree as a fun signature. This creates a lasting memory that they’ll love seeing as they grow up.
- Painting Small Details: Depending on their age, your child might be able to help with painting simple details, such as filling in larger sections of the mural, adding leaves, or even painting flowers and other small elements. Provide them with guidance and supervision, and choose tasks that match their skill level. This way, they can be proud of their contribution without feeling frustrated.
Making the Painting Process a Fun and Memorable Experience
Turning the painting project into a fun activity can create lasting memories for both you and your child. Here are a few ideas to keep the process enjoyable:
- Play Music or Audiobooks: While you paint, play your child’s favorite songs or an engaging audiobook. This keeps the atmosphere light and fun, making the time fly by as you work together.
- Take Breaks for Creative Play: Breaks are important, especially for younger children. Use these moments to do something creative that’s related to the project, like drawing more tree designs on paper, making leaf rubbings, or even reading a story about trees and nature. This keeps them engaged and helps them stay excited about the mural.
- Celebrate Progress: Take a moment to step back and admire your progress together. Whether you’ve finished a tree trunk or added a batch of leaves, celebrating these small milestones helps keep the momentum going and gives your child a sense of accomplishment.
- Capture the Moments: Document the painting process by taking photos or videos. Not only will this allow you to cherish the memories later, but it’s also a great way to show your child how much they contributed to the project.
By involving your child in the mural painting process, you’re not just decorating a room—you’re creating a special bonding experience that they’ll remember for years to come. Plus, they’ll take great pride in knowing that they helped create the space they get to enjoy every day.
Final Touches and Safety Considerations
As you near the completion of your mural, adding those final touches can make your design truly stand out. However, it’s also essential to ensure that the room is safe for your child to enjoy. Here’s how to perfect your mural while keeping safety in mind.
Adding Finishing Touches: Highlights, Shadows, and Accents
Once the main elements of your mural are in place, you can enhance the overall effect by adding highlights, shadows, and accents:
- Highlights: Use a lighter shade of your base color to add highlights to certain areas of the trees. For example, you might add lighter streaks on one side of the tree trunks or branches to create the illusion of light hitting them. This technique adds depth and makes the trees appear more three-dimensional.
- Shadows: To balance the highlights, apply a darker shade to create shadows. This can be done on the opposite side of the highlights, underneath branches, or where leaves overlap. Shadows help ground the mural and give it a more realistic appearance.
- Accents: Finally, add small accents to bring the mural to life. This could include painting tiny details like knots in the wood, adding a bird’s nest in the branches, or scattering a few flowers at the base of the trees. These little touches make the mural unique and personal.
Ensuring All Paint Is Dry and the Room Is Well-Ventilated Before Use
After completing the mural, it’s crucial to allow ample time for the paint to dry completely. Even with low-VOC or non-toxic paints, it’s a good idea to keep the room well-ventilated to ensure any lingering fumes dissipate:
- Drying Time: Check the paint can for recommended drying times, and allow extra time if needed, especially if you’ve applied multiple layers. It’s better to be cautious and wait a full 24 to 48 hours before allowing your child to spend time in the room.
- Ventilation: Keep windows open and, if possible, use a fan to circulate fresh air in the room. This helps the paint dry faster and ensures any residual odors are cleared out before the room is occupied.
Safety Tips: Keeping Paint and Tools Out of Reach, Using Non-Toxic Materials
Safety should always be a priority, both during and after the painting process:
- Keeping Paint and Tools Out of Reach: While working on the mural, ensure that all paint cans, brushes, and tools are stored out of your child’s reach when not in use. This prevents accidents and keeps your child safe from potentially harmful materials. After the project is finished, store any leftover paint and supplies in a secure location, preferably locked away if possible.
- Using Non-Toxic Materials: Always use non-toxic, child-safe paints and materials, especially in a space where your child will spend a lot of time. Look for certifications or labels indicating that the paint is free from harmful chemicals and safe for indoor use. Additionally, if you’re using adhesives, primers, or sealants, make sure they are also non-toxic and suitable for a child’s environment.
By taking these steps, you can ensure that your child’s room is not only beautifully decorated but also safe and healthy for them to enjoy. The final touches you add will bring the mural to life, while the safety precautions you take will give you peace of mind, knowing your child’s space is as secure as it is inviting.
Final Thoughts
Creating a tree mural on your child’s bedroom walls is a wonderful way to bring nature indoors and make their space truly special. With careful planning, the right materials, and some creativity, you can design a room that your child will love for years to come. If you’re ready to get started or need professional help, contact Custom Painting, Inc. at 925-686-0903, or use our contact form to schedule a consultation today.